Table of Contents
DIY Montessori is a creative and cost-effective approach to introducing the Montessori method to your home or classroom. By making your own hands-on learning materials, you can personalize activities to match your child’s developmental stage, interests, and pace while also deepening your understanding of how Montessori works.
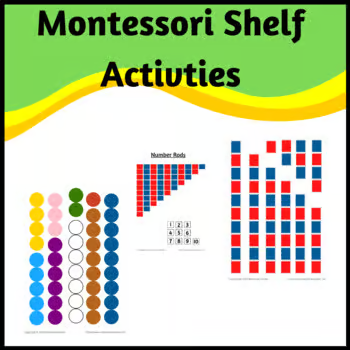
Sandpaper Letters, Movable Alphabet, Language Mat, Sound Cards, and Picture Cards are some common Montessori language materials. Number Rods, Sandpaper Letters, Spindle Boxes, Cards and Counters, and Short Bead Stairs are common math materials.
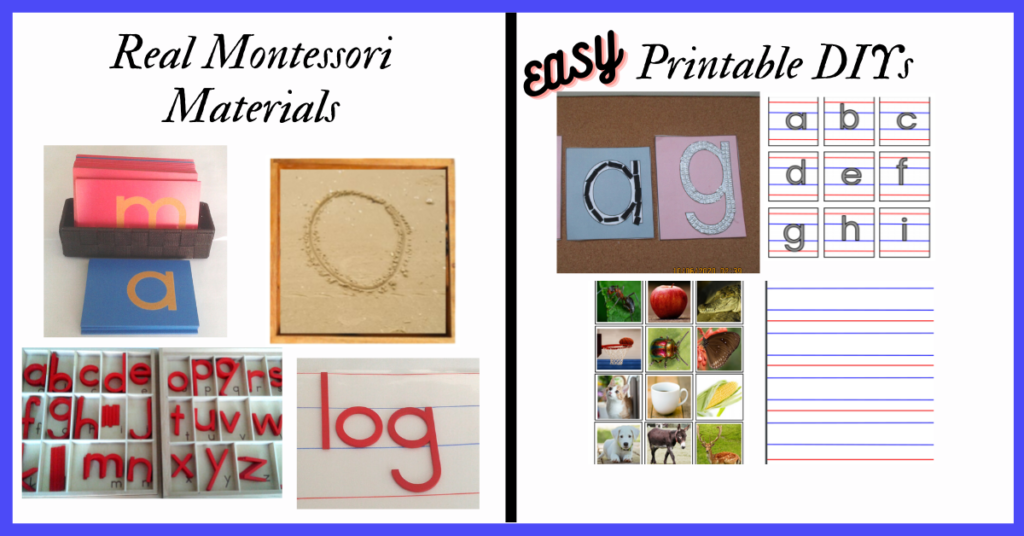
Montessori materials are rooted in years of experience and scientific observation, designed with specific characteristics to support a child’s natural development. While DIY Montessori versions may not replicate every detail of the originals, they can still be incredibly effective when thoughtfully created and properly presented. With the right approach, homemade materials can offer the same rich learning experiences as traditional ones.
Sandpaper Letters & Sandpaper Numbers
Key Characteristics of Montessori Materials (and How to Apply Them in DIY Montessori)
Montessori materials are purposefully designed tools that nurture children’s independence, concentration, and critical thinking. While authentic materials are ideal, you can still maintain their educational value through well-thought-out DIY Montessori adaptations. Here’s a look at the essential characteristics that make these materials so effective—and how you can replicate their benefits at home or in your classroom.
1. Direct and Indirect Purpose
Every Montessori material is designed with both a direct and an indirect learning objective. For example, Practical Life activities like spooning or pouring have the direct goal of fostering independence and life skills. Indirectly, they prepare children for reading and writing by developing hand-eye coordination, left-to-right tracking, and concentration.
✅ DIY Tip: When crafting your DIY Montessori activities, always consider what core skill the material builds directly, and what academic or developmental skill it might support indirectly.
2. Control of Error
One of the defining features of Montessori materials is the built-in control of error. This feature allows children to self-correct without adult intervention, building confidence and independence. For instance, in the Cards and Counters activity, the child uses exactly 55 counters to match with number cards from 1 to 10. A mismatch will leave extra or missing counters, prompting self-correction.
✅ DIY Tip: When designing your DIY Montessori activities, include self-check features to guide independent learning.
3. Goal to Achieve
Montessori materials aren’t toys—they are purposeful learning tools. Every material is tied to a specific goal that encourages repetition and mastery. A child working with a material is not just “playing,” but is intentionally developing a skill through focused activity.
✅ DIY Tip: Ensure each DIY Montessori activity has a clear goal that the child can strive toward with repeated practice.
4. Concrete to Abstract Learning
Montessori learning progresses from hands-on, concrete experiences to abstract concepts. For example, Math begins with tangible materials like the Number Rods to show quantity visually before introducing number symbols. This solid foundation ensures a deeper understanding.
✅ DIY Tip: Start your DIY Montessori math or language activities with real objects or visuals before introducing symbolic representation.
5. Isolation of Difficulty
Each Montessori material isolates one specific concept or difficulty, helping the child focus and master that concept without distractions. For example, a shape activity may include pieces of the same size and color so that only the shape varies.
✅ DIY Tip: Keep your DIY Montessori materials simple and focused—avoid combining multiple new skills in one activity.
6. Gradual Progression from Simple to Complex
Montessori materials are designed to progress gradually in difficulty. Children begin with simple activities and move to more complex ones as they’re ready. For instance:
“After discovering length sensorially through the Red Rods, a second set, coloured red and blue, can be used to associate numbers and length… A third set of rods, much smaller in size because the initial dependence on sensorial learning has passed.”
— Montessori: A Modern Approach, p. 62
✅ DIY Tip: Create sets of DIY Montessori materials that can grow with the child—start simple and add complexity step by step.
7. Designed for an Active Child
Montessori materials are not teacher-centered tools—they are thoughtfully placed in the environment for the child to actively engage with. The teacher’s role is to observe the child, identify their developmental needs, and present the appropriate use of materials. Once introduced, the child is free to choose and work with the materials independently, guided by their own interests and readiness.
“In fine, it may be said that our materials are not a new means to be placed in the hands of an ‘active’ teacher to help her with her teaching.”
— The Discovery of the Child, p. 149
✅ DIY Tip: Store your DIY Montessori materials on open, child-accessible shelves so children can freely choose and explore.
8. Proportionate and Precise
Montessori materials are made to fit a child’s size and strength, enabling them to engage in real tasks with ease. Miniature brooms, dressing frames, and dustpans are not toys—they are real tools designed for small hands, fostering responsibility and independence.
✅ DIY Tip: When making DIY Montessori tools, ensure they are proportionate to the child’s body and comfortable to use.
9. Coordinated Materials
Montessori materials often coordinate across different subject areas. For example, the sizes of the Pink Tower relate to Pythagoras’ Square, and the colors of the Short Bead Stair are echoed throughout math materials. This creates a cohesive learning environment.
✅ DIY Tip: Use consistent color schemes, sizes, and patterns in your DIY Montessori materials to help children make connections across subjects.
10. Possibilities for Creativity
While each Montessori material has a defined structure, there are also opportunities for creativity and exploration. After mastering the basic purpose and variations, children can experiment, mix, and create with the materials in new ways.
✅ DIY Tip: Once your child is confident with an activity, offer open-ended extensions or combine materials to encourage creativity.
How to DIY Montessori Materials
If you’re teaching in a preschool setting, purchasing Montessori materials from reputable online stores is a great option—many offer quality tools at affordable prices. However, if you’re homeschooling or working with a limited budget, DIY Montessori materials are a practical and creative alternative. There are plenty of free printable resources available online that you can download and assemble yourself. With a bit of cutting, pasting, and laminating, you can create meaningful, hands-on learning materials that reflect core Montessori principles.
Language Materials
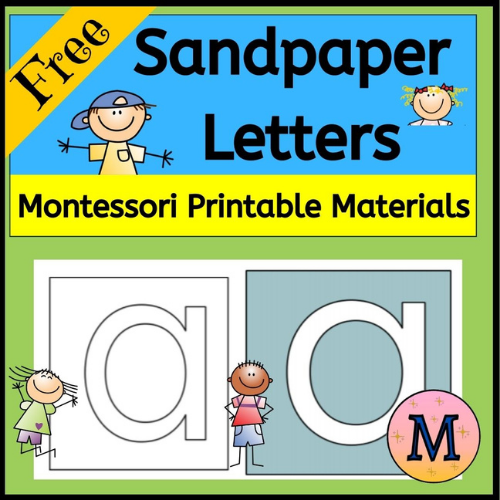
DIY Montessori Sandpaper Letters
Montessori Sandpaper Letters are foundational materials in early literacy. Traditionally made from wooden boards with sandpaper letters, they help children build muscle memory by engaging their sense of touch. These materials introduce phonetic sounds and indirectly prepare the child for writing by training their hand in correct letter formation.
If you’re creating a DIY Montessori version at home or in your classroom, don’t worry—you can still preserve the educational value with simple, budget-friendly materials.
Materials You’ll Need:
- Cardstock (pink for consonants, blue for vowels, or white if using colored letters)
- Printed letters (from your Language Resource Pack)
- Tactile materials (see ideas below)
- Glue or adhesive backing (if needed)
Step-by-Step Guide:
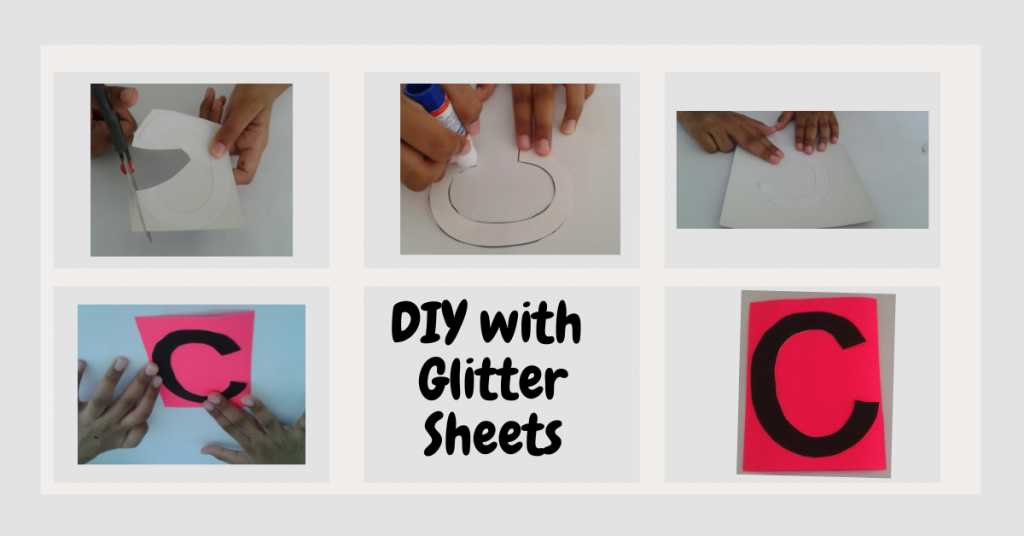
1. Print on Cardstock
Skip the extra step of pasting! Print the Sandpaper Letters directly onto colored or white cardstock.
- If using outlined letters, print on colored cardstock: pink for consonants and blue for vowels.
- If using colored letters, print on white cardstock for contrast.
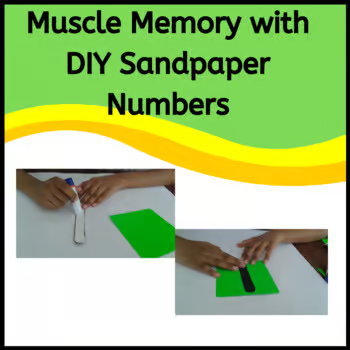
2. Add Texture to Letters
Choose a tactile material to glue over the printed letter shapes. This is where the sensory magic happens!
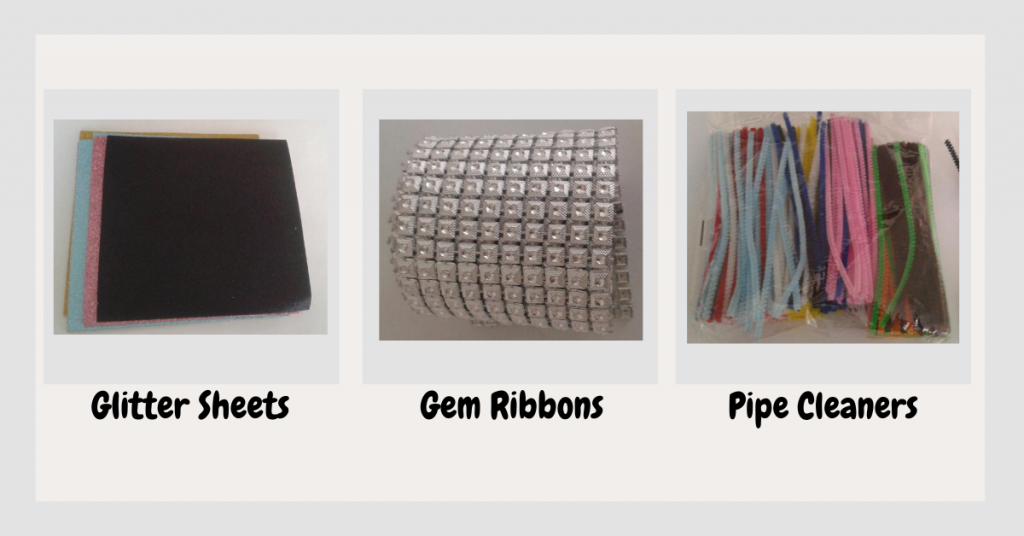
Tactile Options:
- 🟡 Glue + Sand: A classic choice. Simply trace the letter with glue and sprinkle fine sand over it. Shake off the excess. It’s easy, fun, and perfect for a hands-on craft session with your child. (Just make sure to guide them carefully so the letter shape stays accurate.)
- 🔷 Gem Stickers: Choose the kind that comes in pre-lined strips—perfect for clean letter shapes without messy glue.
- ✨ Glitter or Foam Sheets: Trace and cut out letters using adhesive-backed glitter or foam sheets. For this method, print letters on plain paper first, cut them out, and use them as templates. Then trace those onto the glitter/foam and cut to size.
- 🌀 Pipe Cleaners: Flexible, colorful, and great for shaping letters—just glue them in place along the printed outlines.
- 🧱 Sandpaper: For the closest replica of the traditional material, cut out letter shapes from fine sandpaper. It can be tricky, but it’s the most authentic Montessori texture.
✅ Pro Tip: No matter which texture you use, the goal is muscle memory through tactile experience. So, keep the shapes crisp, consistent, and true to the letter form.
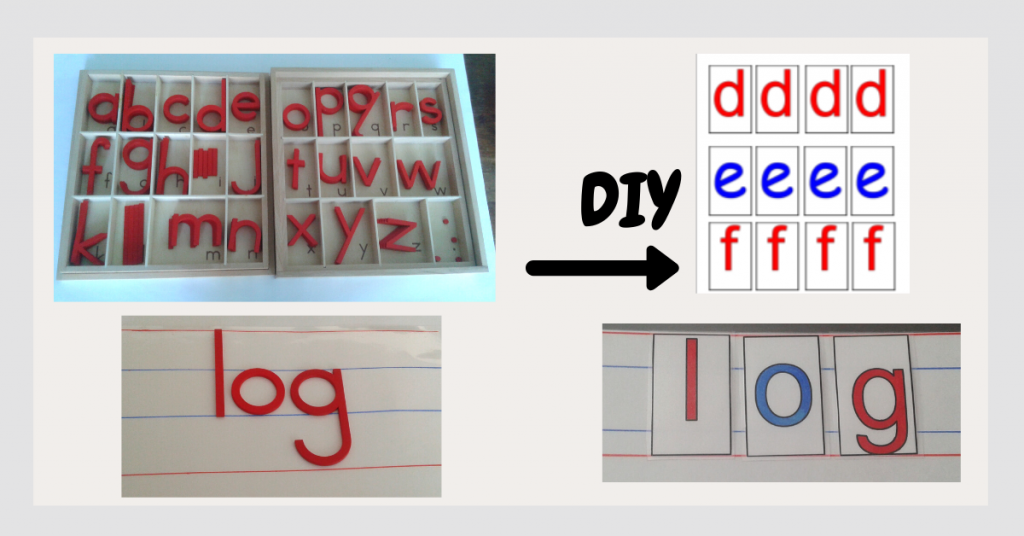
Real Movable Alphabet letters are wooden cutouts. They are kept in separate compartments, for the child to easily pick the right sound.
DIY Montessori Movable Alphabet
Real vs. DIY Movable Alphabet
🧰 Real Montessori Movable Alphabet
- Wooden lowercase letters (typically red for consonants, blue for vowels)
- Stored in a box with individual compartments for each letter
- Requires a large mat (approx. 25” x 15”) to give the child enough space to build words
✅ Tip: Use red and blue permanent markers to draw lines on the mat to guide placement.
✂️ DIY Printable Movable Alphabet
If you don’t have the traditional set, you can easily make your own using the Language Resource Pack!
Here’s How:
- Print, Cut, and Laminate
Print the letters from the Language Resource Pack on sturdy cardstock.- Use red cardstock for consonants
- Use blue cardstock for vowels
Or print in black on white paper and colour-code the backgrounds!
- Laminate for Durability
Laminating the letters makes them long-lasting and resistant to wear, especially useful for frequent use or classroom settings. - Use with the Printable Language Mat
- Print the A4-sized Language Mat from the pack.
- Laminated, this mat doubles as a dry-erase board, perfect for practicing writing on the line!
✅ DIY Tip: Keep the letters organized in a small container or envelope system to make it easy for children to find and return each letter.
Language Mat
Ideas for Use:
- Build phonetic CVC words (e.g., cat, bed, sun)
- Match words to DIY picture cards
- Use alongside sandpaper letters to reinforce sound-symbol connections
- Create rotating language center activities for independent learning
Picture Cards and Sound Cards
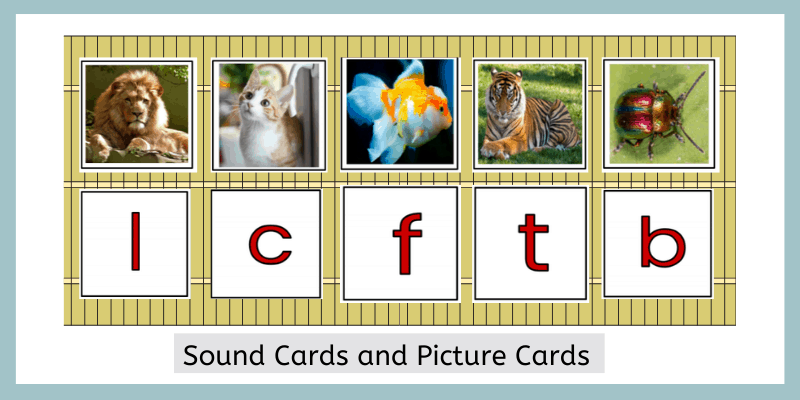
Using Object Boxes for Beginning Sounds
Gather a small collection of tiny objects to help introduce beginning sounds. These can be miniature toys or real household items—like a small plastic dinosaur for “d” or a toy teacup for “c.” You don’t need to find objects for every letter of the alphabet right away. Picture cards can be used as substitutes, especially for less common sounds. However, for the first few letters, it’s best to use real objects whenever possible. Tangible items provide a more concrete and sensory-rich experience, aligning with the Montessori principle of introducing concepts through hands-on materials before transitioning to more abstract representations.
- Print the Printable Sound Cards and Picture Cards.
- Cut and laminate. It’s ready to use!
You’re Ready to Begin the Journey into Writing and Reading. With these five foundational materials, you now have everything you need to take the first step in guiding your child toward writing and reading. While the materials may seem simple, they offer months of meaningful learning. Unlike spoken language, which develops naturally, reading and writing require intentional guidance and practice.
Dr. Montessori observed that children between the ages of 0 to 6 are in a Sensitive Period for Language, making this the ideal window to introduce literacy activities. By providing the right materials at the right time, you’re helping your child build essential skills in a way that feels natural, engaging, and joyful.
Math Materials
Number Rods
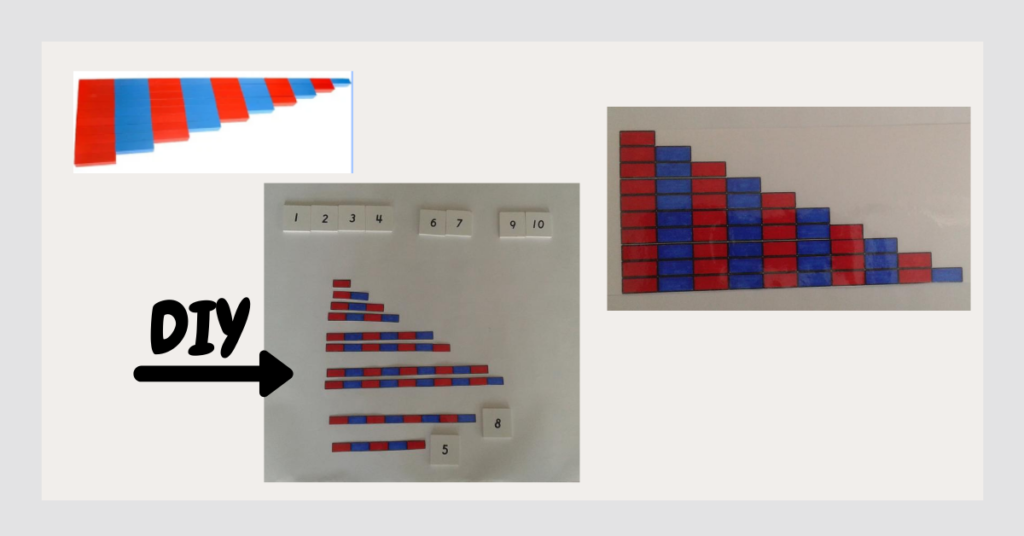
DIY Montessori Number Rods
The Number Rods are one of the first math materials used in Montessori. These rods, traditionally wooden, are divided into alternating red and blue sections to represent numbers and lengths.
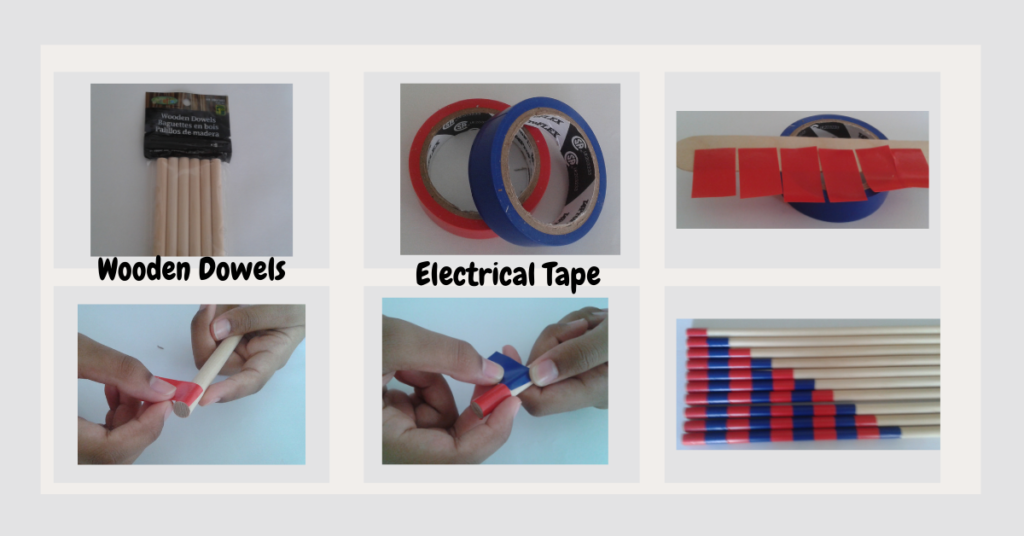
To create a DIY version, start by gathering 10 wooden craft sticks of decreasing length. The rods don’t need to follow specific measurements (such as 10 cm to 100 cm). For example, you could use craft sticks ranging from 1″ to 10″. The key is that they should decrease in length proportionally—if the first stick is 1″, the second should be 2″, and so on.
Next, paint or wrap red and blue tape around the sticks to mimic the Montessori Number Rods. If you can’t find craft sticks, an easy alternative is to use red straws and blue tape (or vice versa). The flexible nature of straws makes them simple to cut to the desired length.
Alternatively, you can use wooden dowels and electrical tape to create another version of the Number Rods, as shown in the example below. This method can give you a sturdy and durable option for your DIY Montessori materials.
Find Digital and Printable Montessori Resources at Montessori Pulse, Teachers Pay Teachers store
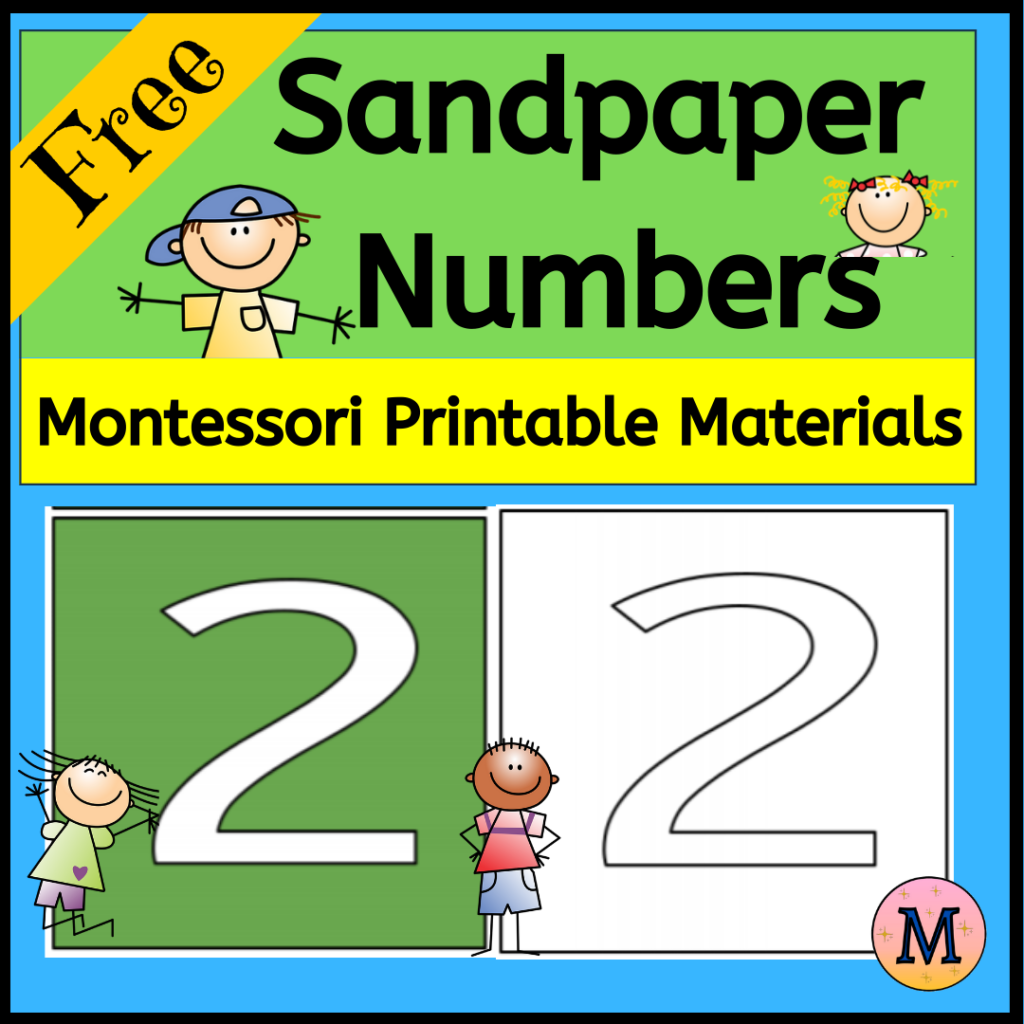
Sandpaper Numbers
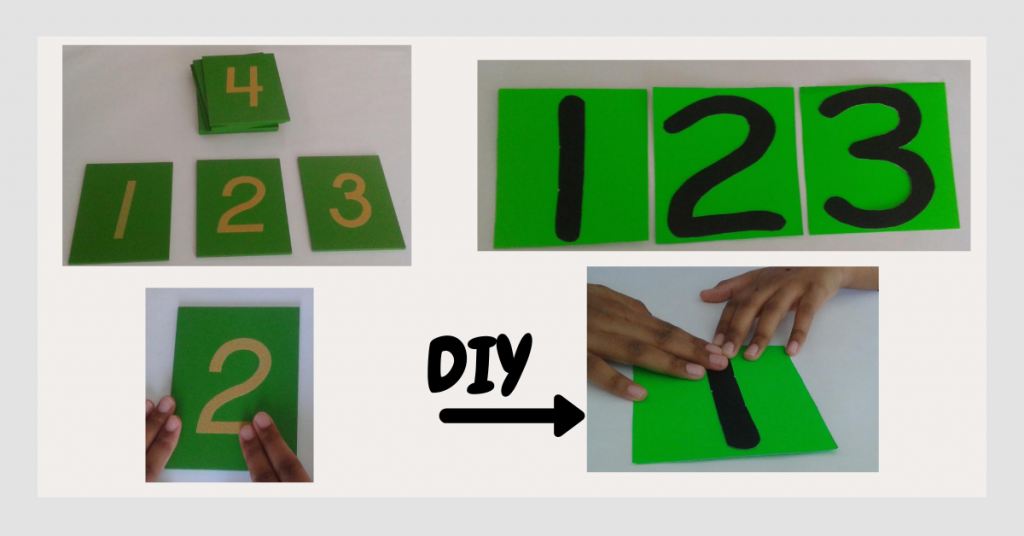
DIY Sandpaper Numbers
While authentic Montessori Sandpaper Numbers are made of wood and sandpaper, you can create a similar experience at home using cardstock.
Start by printing the Free Sandpaper Numbers from the Language Resource Pack directly onto cardstock to skip the extra step of pasting them onto cardboard. If you’re using number outlines, consider printing them on colored cardstock for added visual appeal.
Now, it’s time to add a tactile element to the numbers. You can glue something tangible to fill in the numbers for a sensory experience that promotes muscle memory.
Here are some ideas for filling in the numbers:
- Gem Stickers: Choose ones that come in lines to replicate the contours of each number.
- Glitter or Foam Sheets: Cut out number shapes from glitter or foam sheets. If you’re using glitter sheets, avoid printing directly on cardstock. Instead, print the numbers on regular paper and use them as guides to cut out the shapes from glitter sheets. Adhesive glitter sheets are easier to work with, though regular sheets are more affordable and still yield great results.
- Pipe Cleaners: Twist them into number shapes for a fun, hands-on option.
- Sandpaper: For the most authentic feel, cut numbers from sandpaper, but be mindful that it can be a little tricky to cut out the shapes precisely.
Remember, this project is meant to be fun, but it’s also important to ensure that the number shapes are clear and accurate for the child to work with. This activity not only introduces numbers but also enhances fine motor skills and tactile learning.
DIY Montessori Spindle Box
The Spindle Box is a fun and engaging Montessori activity that helps children connect with numbers and quantities. I’ve noticed that children often continue to choose this activity even after they’ve mastered it—probably because it provides a tactile, hands-on way to learn. It’s also an excellent tool for introducing the concept of the number Zero.
How to Make Your Own Spindle Box:
You don’t need a specific wooden box to replicate this material. You can use simple household items like:
- Pencil storage boxes
- Mason jars (without lids)
- Cups
Next, label each container with the numbers from 0 to 9.
For the spindles, you have several options:
- Unsharpened pencils
- Thick straws
- Craft sticks
- Wooden dowels
- Popsicle sticks
You’ll need 45 spindles in total, with each number container holding the corresponding number of spindles. For example, the container labeled “3” will hold 3 spindles.
This activity allows the child to associate concrete objects with quantities, reinforcing their understanding of numbers in a meaningful, hands-on way.
DIY Montessori Cards and Counters
This is one of my favorite math materials because it introduces multiple key math concepts and is incredibly versatile to have on hand. It allows children to explore the relationship between numbers and quantities in a concrete way.
- Replace Wooden Number Cards with Cardstock:
Instead of the traditional wooden number cards, you can create your own using cardstock. - Download and Print the Printable Cards:
Download the printable number cards and print them directly onto cardstock to avoid the extra step of pasting them. - Laminate for Durability:
Laminate the printed cards to ensure they last longer and can be used repeatedly in your lessons. - Counters:
For the counters, you can use any small objects you have on hand, such as:- Small rocks
- Poker chips
- LEGO pieces
This activity helps children make a tangible connection between the numbers and the quantities they represent, fostering a deeper understanding of number sense.
Short Bead Stair
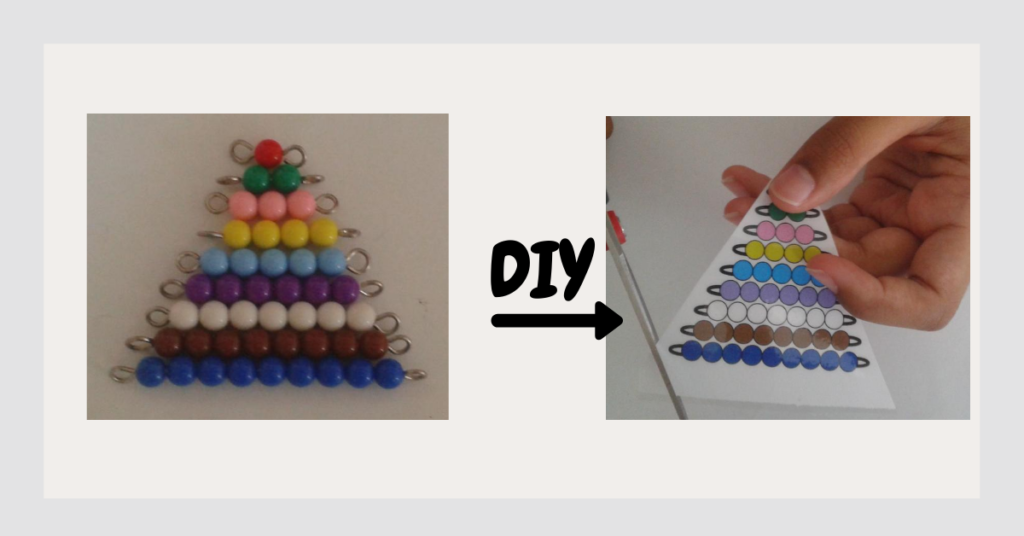
DIY Short Bead Stair
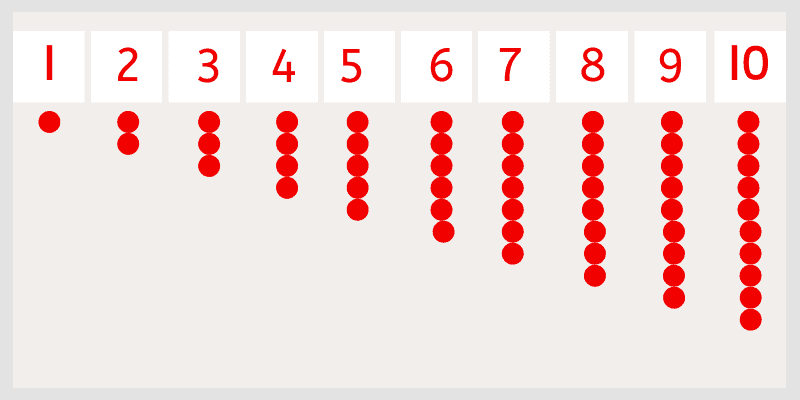
The Short Bead Stair is a Montessori material consisting of bead bars representing quantities from 1 to 9. Each number has its own color:
- 1 is red,
- 2 is green,
- 3 is pink,
and so on.
- Beads and Materials:
You can create bead bars using coloured beads and metal wire, both available at most craft supply stores. It’s a good idea to make more than one set if possible for flexibility in use. - Printable Short Bead Stair:
If you prefer a simpler version, print out the Printable Short Bead Stair from the Math Resource Pack and laminate it for durability.
The Short Bead Stair is a fantastic way to introduce number sense, color recognition, and quantity relationships to children. It is an essential tool for any Montessori-inspired classroom.
A Brief Look at Dr. Maria Montessori’s Legacy
Dr. Maria Montessori, over 100 years ago, created the Montessori materials inspired by her teachers, Jean Itard and Edouard Seguin. After studying under them, she spent two years working with children at the Orthophrenic School, where she observed and documented their learning. She spent countless after-school hours preparing new materials to meet the needs of the children in her care.
Conclusion
While real Montessori materials are based on years of scientific observation and thoughtful design, DIY printable materials can still be incredibly effective. Though they may not have all the characteristics of the authentic materials, they are still a great way to lay a solid foundation in both phonics and math for young learners.
Find Digital and Printable Montessori Resources at Montessori Pulse Teachers Pay Teachers store
This is a lot of good information!!
Wonderful post on Montessori materials. I absolutely love all of the detailed ideas on options of creating your own DIY learning materials. Thank you for this wonderful post!
Thank you!
Thank you!
Very informative post! I have been interested in Montessori, but didn’t know much about it. This really helped me understand what it’s all about.
Wow this was a really interesting read! I have heard about Montessori before, but thought you had to buy certain materials and toys. This post to do Montessori DIY style was right up my alley! Thanks!!
Thank you, Jenny!
Thank you, Sarah!